
If you checked source code of WPJack you noticed that we use a bunch of utility classes all from Tailwind CSS framework.
Here I’ll share how I setup my local environment for each new Tailwind-based WordPress theme.
Requirements
In order to run locally my setup you need PHP, Composer and MySQL installed.
I am usually developing on Ubuntu OS and it’s basically a web server so I don’t need any virtualizations. When I am on Mac I use LocalWP.
This is boring part and you can easily google this, there are thousands of tutorials how to install LAMP stack on any OS.
When I need to refresh my memory I search for Ubuntu 20.04 LAMP, or Ubuntu 20.04 php,…
You can follow this article is pretty good How To Install Linux, Apache, MySQL, PHP (LAMP) stack on Ubuntu 20.04.
Install Tailpress
Since you’re going to use Tailwind it makes sense to use bolierplate project based on it.
The best option is Tailpress.
You need to install Tailpress installer first:
composer global require jeffreyvanrossum/tailpress-installerAfter this you’ll have tailpress command available, a when you run tailpress –help you should see something like this:
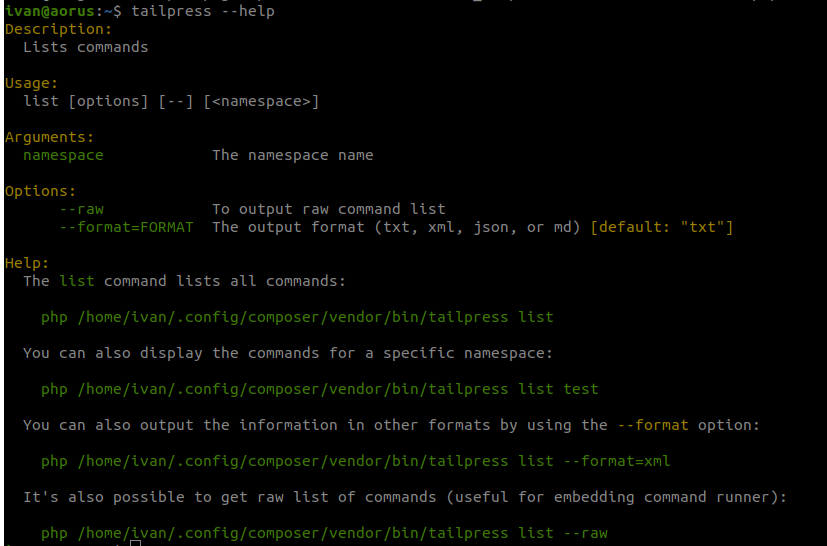
If you’re seeing command not found error, that means you’re missing tailpress in your PATH. Follow it’s FAQ to fix that.
Create new project
Visit folder where you store all your projects and type:
tailpress new my-new-projectInstaller will ask you do you want to install WordPress as well. If you run this command outside of WP go and install WP also.
It’ll configure new WP installation and create new theme folder in wp-content/themes/ folder.
Open your IDE and choose theme folder directly, you don’t need entire WP codebase.
Setup webserver
Now you need to tell your local webserver how should it serve this new WP installation.
In my case I use Nginx, and for each project I have local .test domain.
I direct all .test domains from /etc/hosts file to 127.0.0.1.
Example virtual host config for Nginx:
server {
    listen 80;
    server_name tailpress.test;
    root /home/ivan/Code/tailpress;

    index index.html index.htm index.php;

    client_max_body_size 40M;


    location / {
        try_files $uri $uri/ /index.php?$query_string;
    }

    location = /favicon.ico { access_log off; log_not_found off; }
    location = /robots.txt  { access_log off; log_not_found off; }


    location ~ \.php$ {
        include snippets/fastcgi-php.conf;
        fastcgi_pass unix:/var/run/php/php7.4-fpm.sock;
     }

    location ~ /\.ht {
        deny all;
    }

}
You would need to replace domain, root path and php version to match what you want.
After you’re done enable site with:
ln -s /etc/nginx/sites-available/tailpress.test /etc/nginx/sites-enabled/tailpress.testNow you need to restart Nginx web server with service nginx restart.
When you visit tailpress.test from your browser you should see WP site.
Setup MySQL and install database
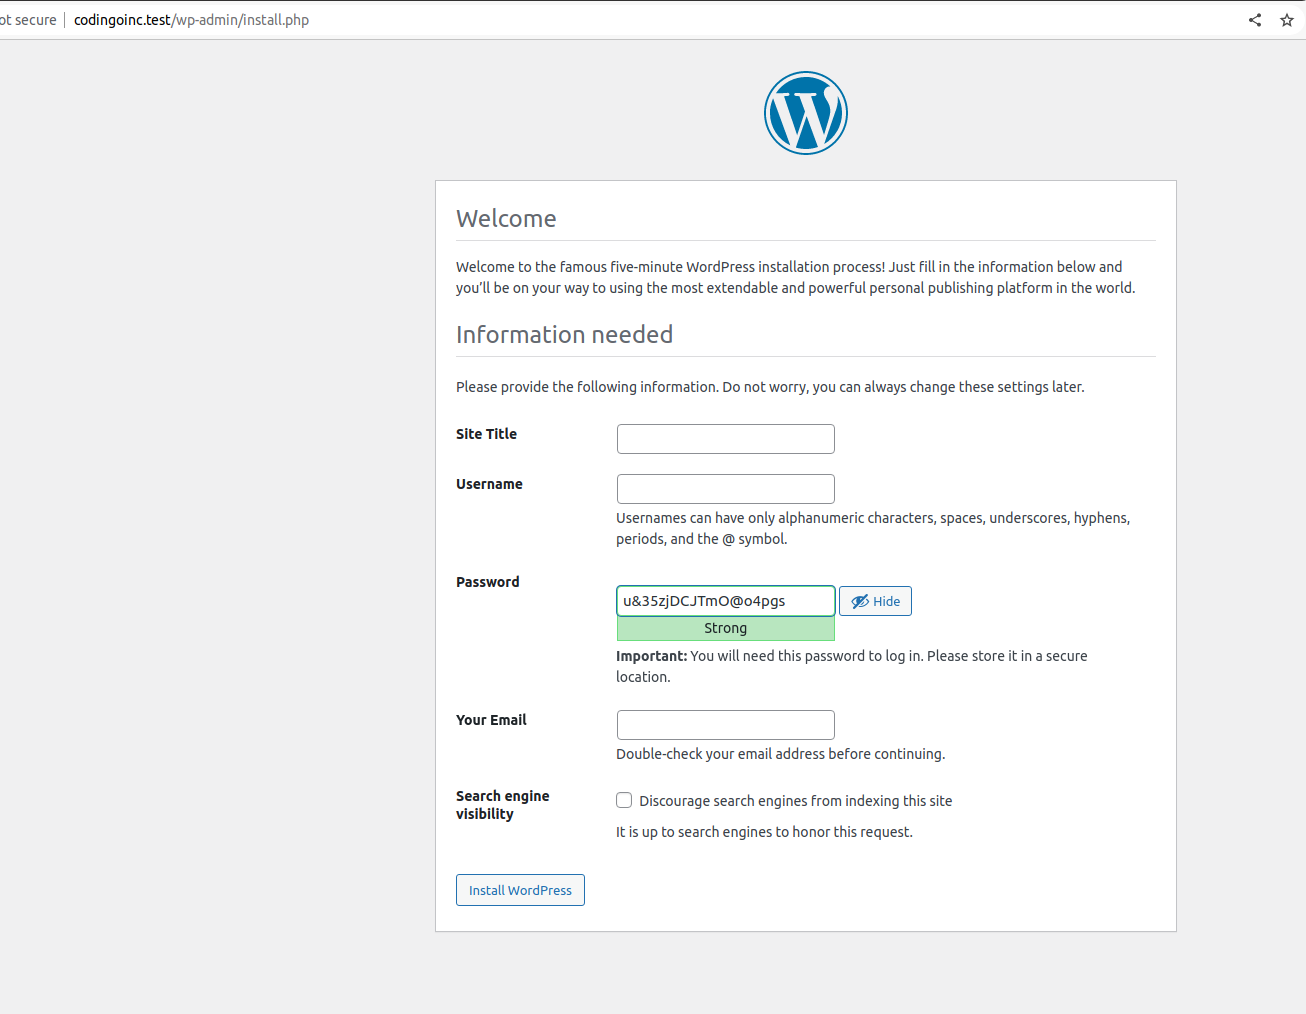
Tailpress installer can not install WordPress database because it does not have mysql credentials.
You need to manually create new database and replace those credentials in wp-config.php file.
After that visit your local site and complete installation.
Run npm
From root of your new theme run npm install.
Check package.json file for all actions you can take.
Usually for development you need npm run watch.
Activate new theme in WordPress
Go into Appearence → Themes and activate Tailpress
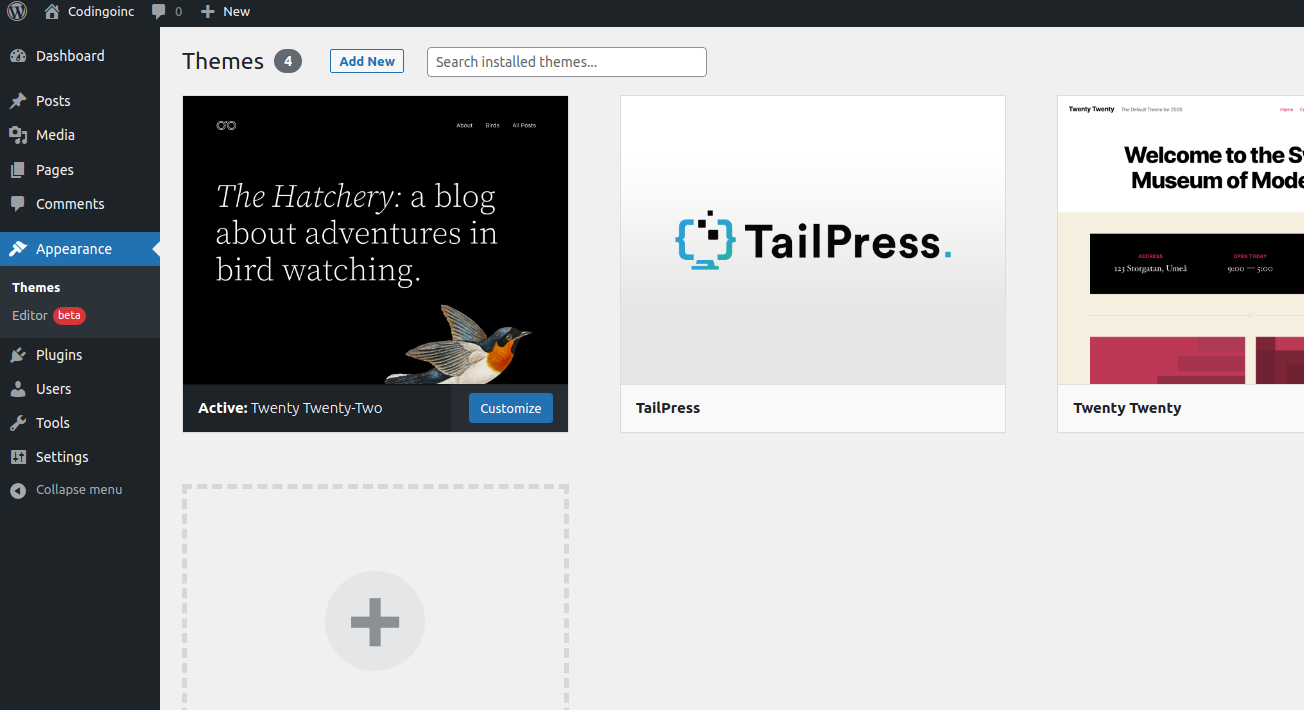
Now when you visit homepage, you’ll see new theme.
You have a working local development setup for Tailwind framework. Good job!
Free Tier includes 1 server and 2 sites.