Getting Started Guide
In this guide we'll show you how you can install WordPress server on the Cloud Provider of your choice, how to add WordPress blog to it and basic site features.
Based on the Cloud Provider you use go to the required section:
Connecting Hetzner as a cloud provider
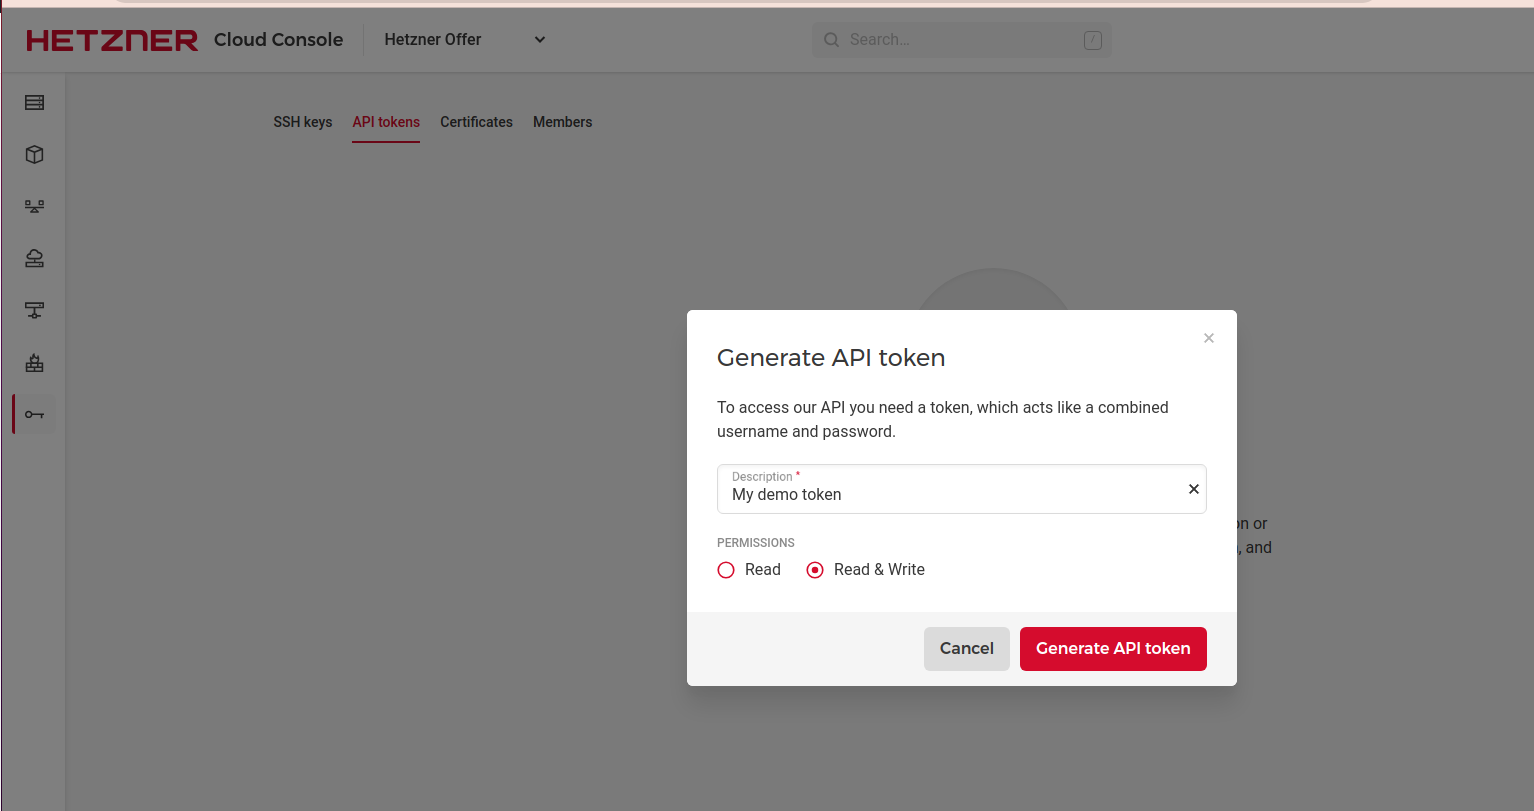
Go into Hetzner Cloud open your server group, click on the Security page and choose API tokens tab.
On this page you need to create API token with Read & Write permissions. If you choose only Read permission installation will fail.
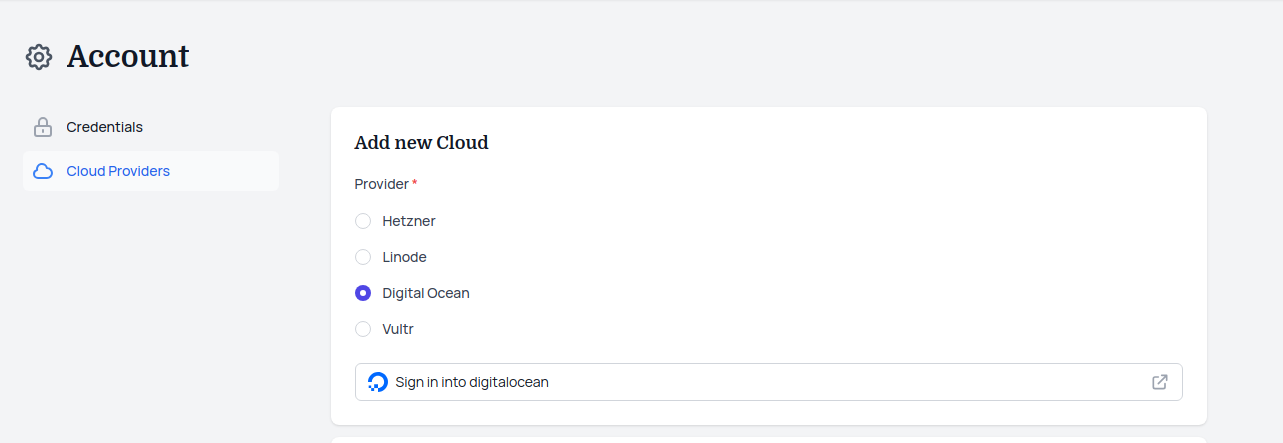
Go back to WPJack dashboard and go into Account -> Cloud Providers.
From here choose Hetzner, insert title for your connection and paste the API token.
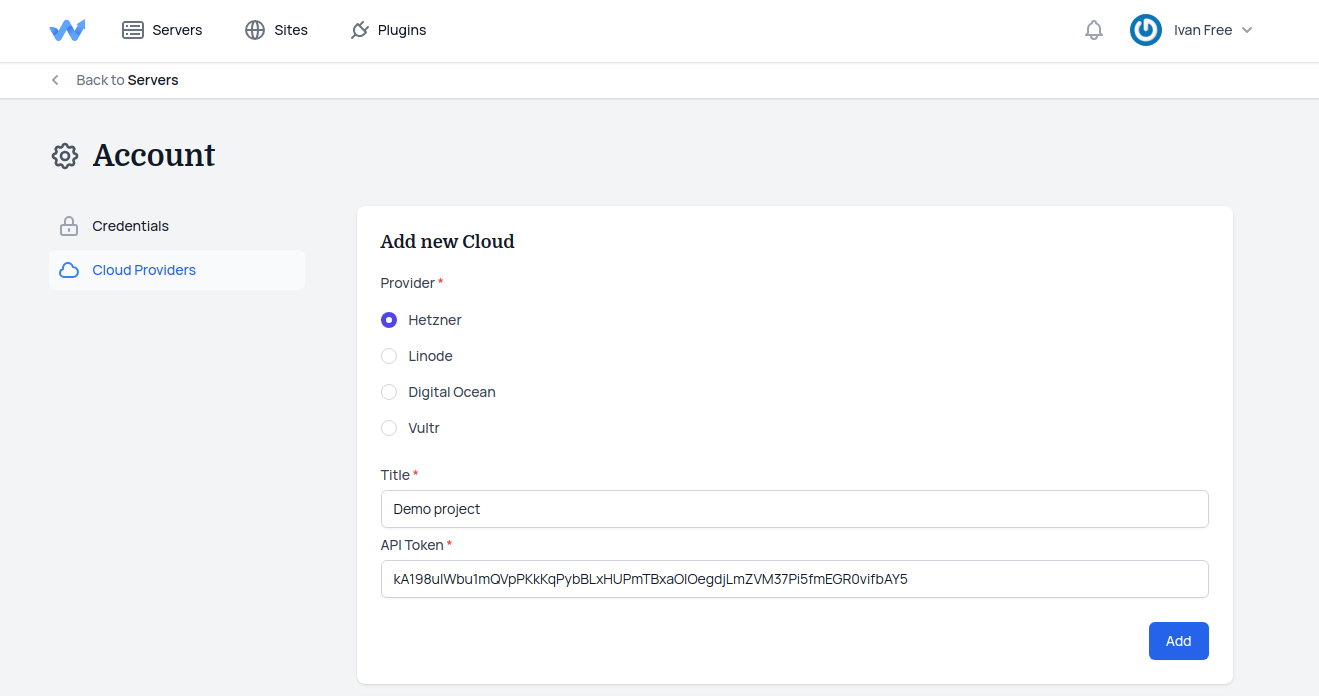
Finally, click the Add button.
Now you're ready to install a server, go to Installing new server section.
Connecting Vultr as a cloud provider
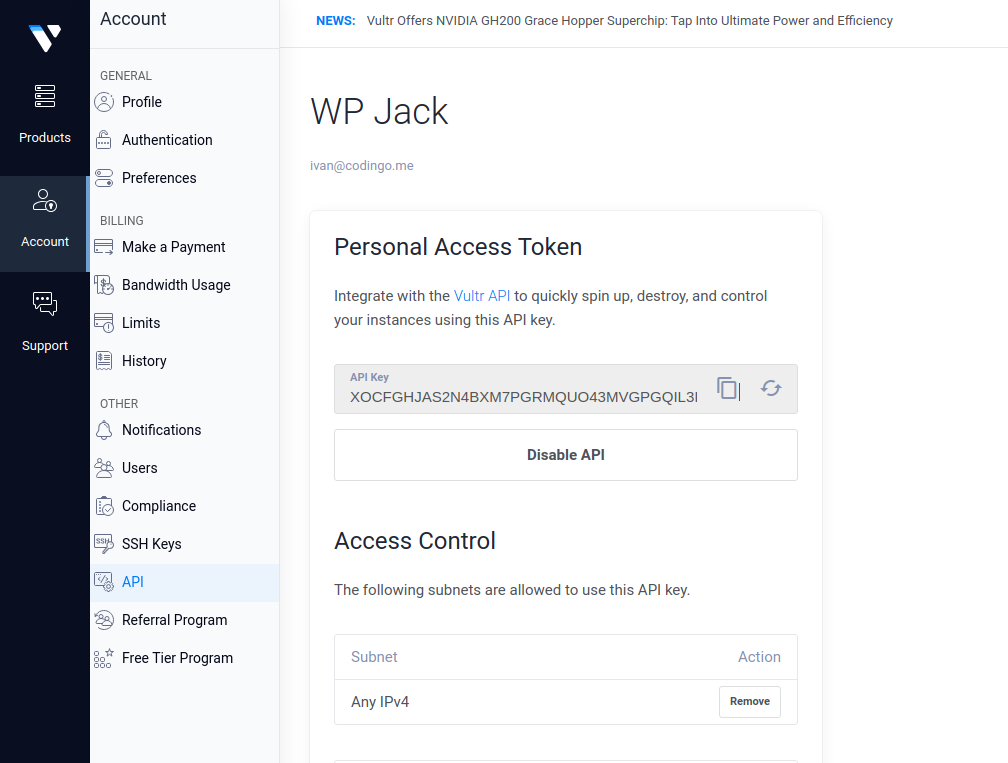
Go into Vultr and open your Account Settings and then API page.
On this page you will see a Personal Access Token, if it's not preset Enable it.
Vultr also locks access to their API based on IP address, just add Any IPv4 rule. If you're concerned about access, you can remove it later when you install server.
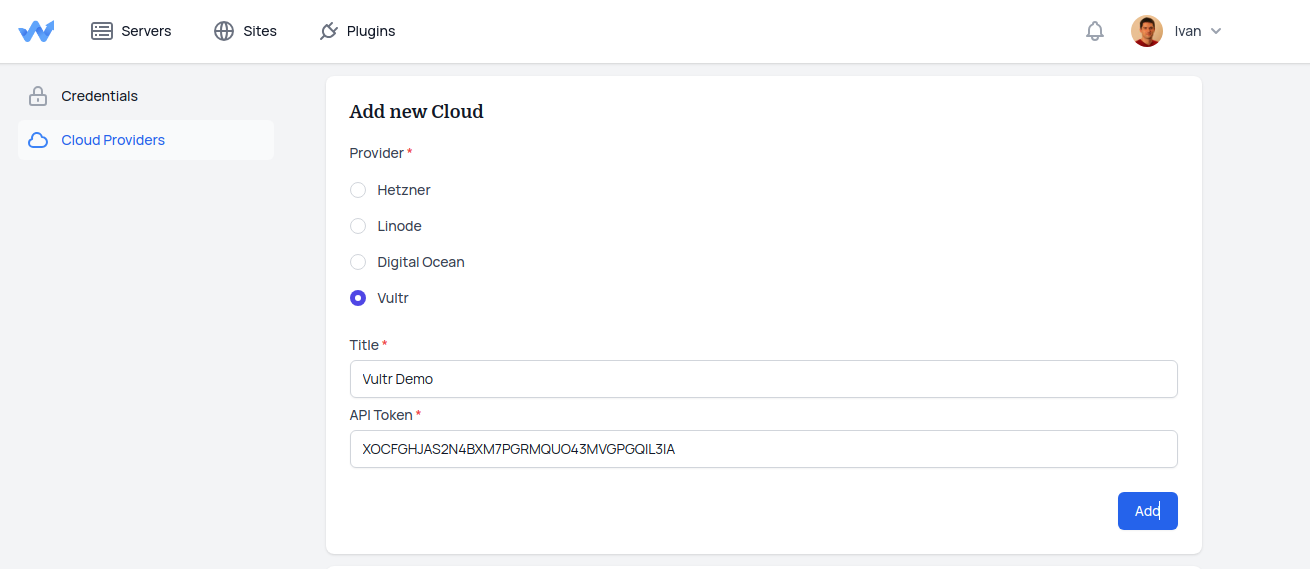
Go back to WPJack dashboard and go into Account -> Cloud Providers.
In the server creation form choose Vultr, write title of the connection and paste the key.
After successful connection creation go into server installation section.
Connecting Digital Ocean as a cloud provider
Connecting Digital Ocean account to WPJack is very easy, since integration is using oAuth flow.
Go into Account -> Cloud Providers and choose Digital Ocean. You will be presented with the button, click it.
On Digital Ocean authorization page you need to manually click the checkbox with WPJack. And after that click the button Authorize application.
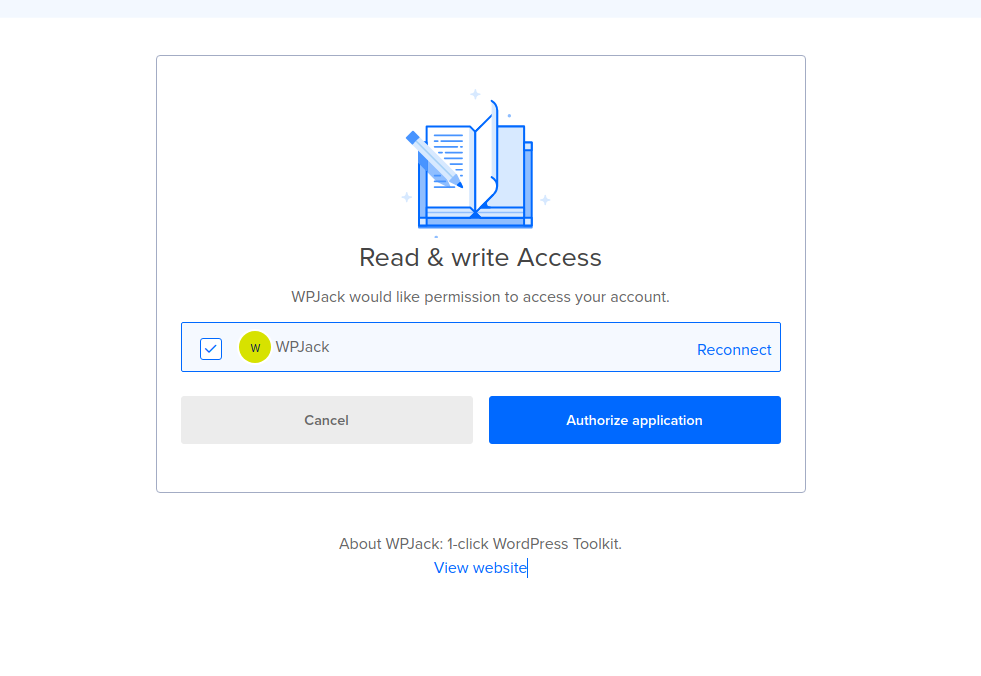
Without WPJack checked Digital Ocean connection won't work.
Continue to Creating new server.
Connecting Linode as a cloud provider
Connecting Linode/Akamai is 1-click away.
Go into Account -> Cloud Providers and choose Linode.
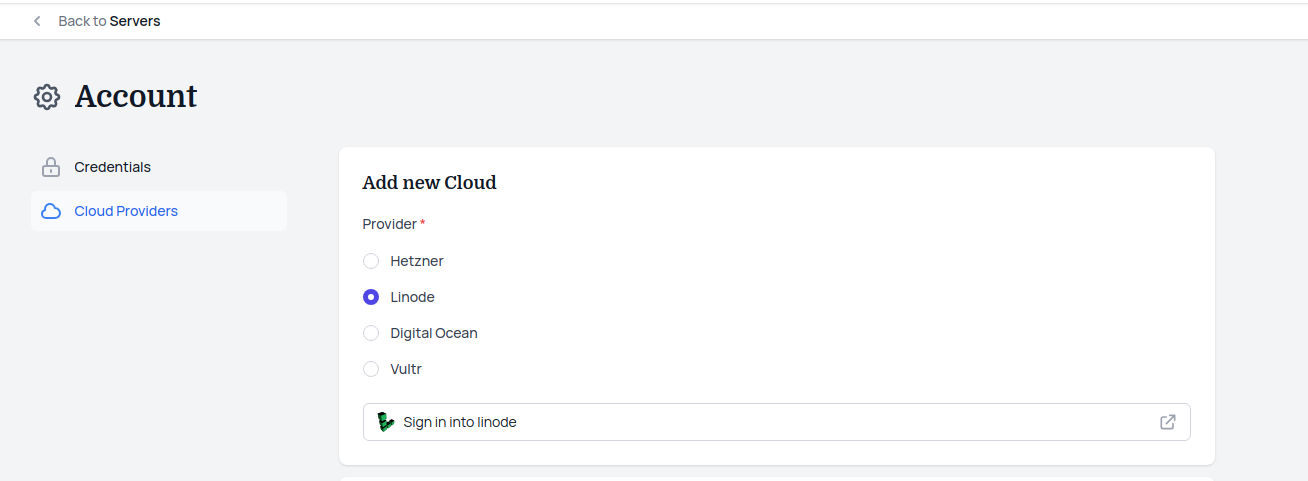
Clicking on this Sign in into linode button you'll be redirected to authorization page.

On this page you need to click Accept and Continue, and you'll be redirected back to WPJack.
Now you're ready to install new server.
Creating WordPress Server
Go into Servers page and click on the Create Server button.
You will be presented with the modal where you can select which cloud provider connection you want to use.
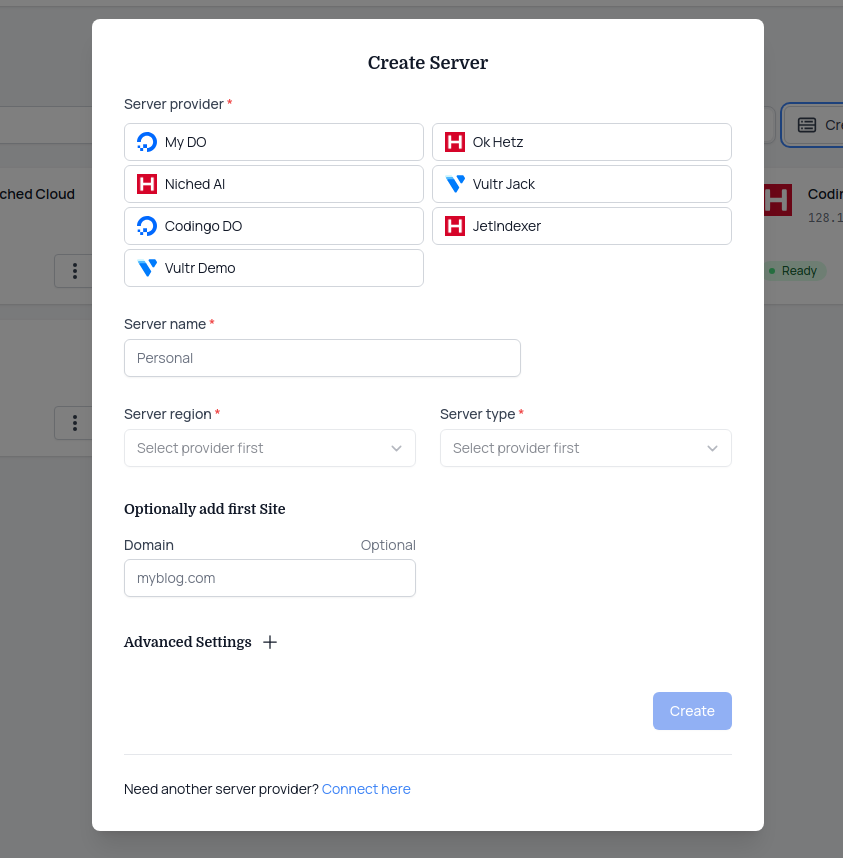
Based on the connection selected WPJack will load server regions.
After selecting server region, server types will be loaded. These actions are chained since every connection has different regions, and every region has different server types.
Through this form you can optionally add first site. Make sure you are entering real domain or subdomain, and that you have access to its DNS.
You can always add later sites.
In Advanced settings you can choose type of the database MySQL or MariaDB. We use MySQL 8 as a default selection.
When you're done click Create button.
Depending on the cloud provider this server installation takes up to 10 minutes. After that adding new site takes a few seconds only.