When it's time to transfer a WordPress site to a new host, you're essentially moving two things: the website's files and its database. The files cover everything you see—your theme, plugins, and all those media uploads. The database is the brain, holding all your content like posts, pages, and user settings. The whole dance involves backing up both, getting them onto the new server, tweaking a few config files, and then, the final step, telling your domain where its new home is.
Why Smart Site Owners Change Their WordPress Host
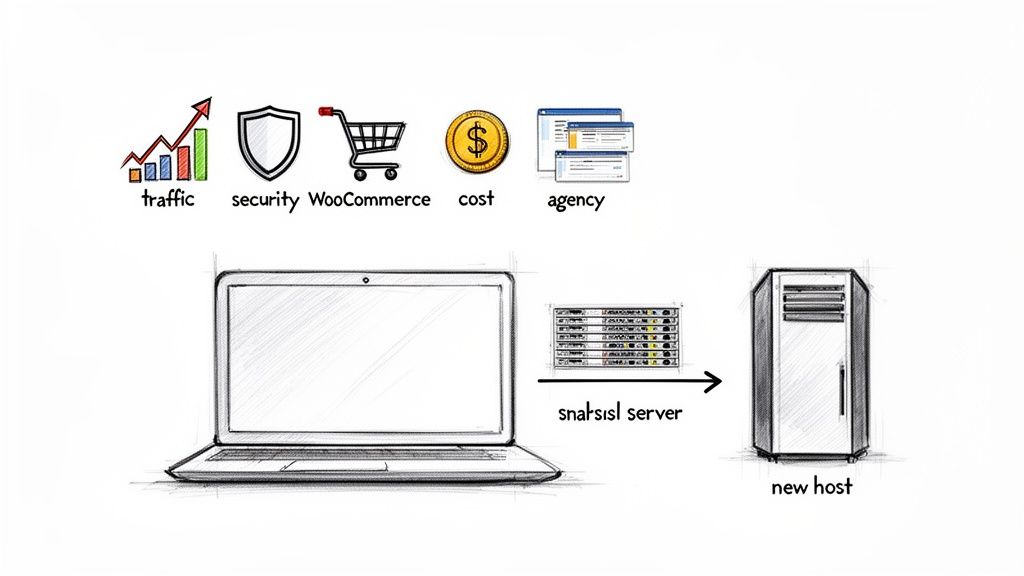
Making the jump to a new host is almost never a spur-of-the-moment decision. It usually comes after a string of headaches that start to affect your business, your audience, or just your sanity. That cheap shared hosting that seemed like a great deal at first? Its appeal wears thin fast once your site starts picking up steam.
Common Migration Triggers
For many, the first sign of trouble is performance. Your once-snappy blog now takes ages to load, or your WooCommerce store grinds to a halt during a big sale. These aren't just minor annoyances; slow sites kill conversions and sink your search rankings.
Security is another huge motivator. Getting hacked—or even just realizing how flimsy your current host's protections are—is a serious wake-up call. Suddenly, that low monthly price doesn't seem worth risking your customer data and your reputation.
If you're an agency or developer, the pain is often about inefficiency. Trying to manage a dozen client sites on different, clunky hosting panels is a recipe for disaster. This is where a modern control panel like WPJack becomes a lifesaver, giving you a single dashboard to wrangle all your servers and sites without the usual mess.
A website migration is an opportunity to fix underlying issues. It's not just about changing servers; it's about upgrading your site’s foundation for better speed, security, and scalability.
The Scale of WordPress Hosting Needs
The demand for solid WordPress hosting is massive. As of 2025, WordPress powers an incredible 43.1% of all websites on the internet. That's roughly 810 million sites, and you can bet a good chunk of their owners are constantly weighing their hosting options for better performance or a fairer price.
Before we get into the nitty-gritty of a WordPress move, it helps to know the general lay of the land. This guide on how to migrate a website to a new host gives a great high-level view of the whole process. Having that foundation makes the WordPress-specific steps we're about to cover much clearer, setting you up for a smooth transition.
Your Pre-Migration Game Plan for a Flawless Transfer
I've seen it a hundred times: a successful WordPress migration is 90% preparation and only 10% execution. Trying to move a site without a solid plan is like building a house without blueprints—you’re just asking for trouble. Getting your ducks in a row first turns a potentially frantic, stressful job into a smooth, predictable process.
The absolute first thing you must do is get a complete, verified backup of your entire website. This is your safety net. It’s your undo button. It is completely non-negotiable. Don't just rely on your host's automated backups; you need to take matters into your own hands and generate fresh copies yourself.
Secure Your Assets with Redundant Backups
To be truly safe, you need at least two separate backups made with different methods. This kind of redundancy is a lifesaver. If one backup happens to be corrupted or fails for some reason, you've got another reliable copy ready to go.
Here's the approach I always take:
- Use a Plugin: Grab a trusted backup plugin like UpdraftPlus or Duplicator. Run a full backup that grabs everything—database, plugins, themes, and all your uploads. Download that full archive directly to your computer.
- Use Your Host's Control Panel: Next, log into your current host’s cPanel, Plesk, or whatever dashboard they provide. Use their built-in backup utility to generate another full site backup. This usually gives you a compressed
.tar.gzfile of yourpublic_htmldirectory and a separate.sqlfile for the database.
Having both a plugin-based backup and a server-level one covers all your bases. If you want to dive deeper into the nuts and bolts of this, check out our guide on how to back up and restore a WordPress site.
Think of your backup as an insurance policy. You hope you never need it, but you'll be incredibly relieved it's there if something goes wrong. A single verified backup can be the only thing standing between a minor hiccup and a catastrophic failure.
Document Your Current Environment
Before you can move your WordPress site, you need to know exactly what you’re moving. It's like trying to reassemble a complex engine without knowing what all the parts are. Taking a moment to document your setup can save you from huge compatibility headaches on the new server.
Just create a simple text file and jot down these key details:
- WordPress Version: What version are you running?
- PHP Version: This one is critical. Your new server absolutely must support the same version or a newer, compatible one.
- Active Plugins: Make a list of every single active plugin and its version number.
- Theme Details: Note down your active theme, its version, and if you're using a child theme.
- Custom Code: Did you add any custom snippets to
functions.phpor make tweaks to.htaccess? Save a copy of those files.
This quick "snapshot" of your site's environment is invaluable. It helps you instantly troubleshoot issues after the move, like a plugin that starts acting weird because the new server’s PHP version is different.
Develop a Rollback Plan
What happens if it all goes wrong? A rollback plan is your pre-defined escape route. It's a simple set of steps you'll follow to get your site back up and running on the old host if the migration hits a serious snag. It's your emergency exit strategy.
Your plan can be as simple as this: "If the new site shows critical errors after 30 minutes of testing, I will immediately re-point the domain's A records back to the old server's IP address." Knowing this ahead of time takes the panic out of the situation.
Finally, timing is everything. Plan your migration for a period of low traffic. For most sites, this means late at night or over a weekend. This minimizes the chance of disrupting your visitors and gives you a calm window to work without the pressure of peak-hour traffic breathing down your neck.
Choosing Your Migration Path: Manual vs. Plugin
Alright, you've got your backups locked down and your pre-flight checks are done. Now you’re at a fork in the road. How are you actually going to move your site? You have two main options: the old-school manual route or the much friendlier plugin approach. The right choice really boils down to your technical confidence, how complex your site is, and how much you want to be in the driver's seat.
This decision tree gives a good visual of the prep work that gets you to this point, hitting on the importance of backups, documentation, and scheduling your move.
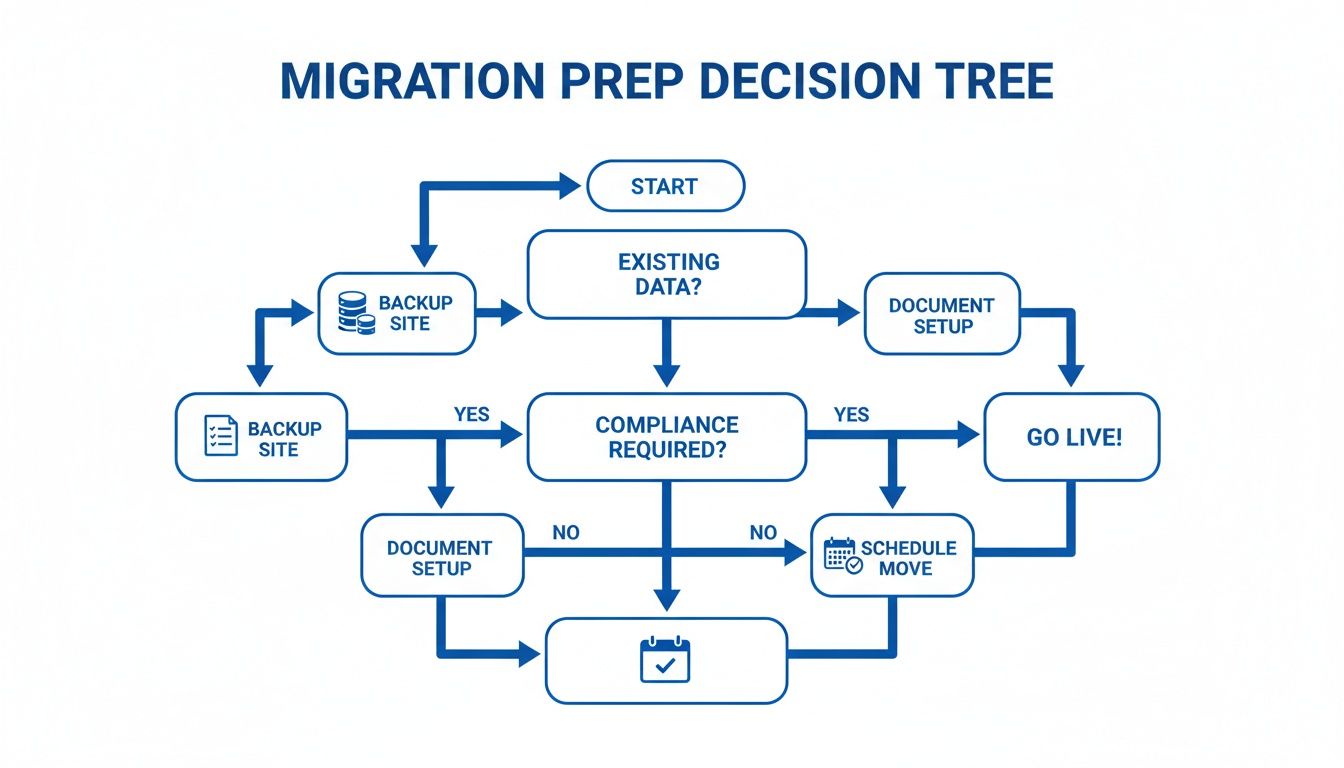
The key takeaway here is that a smooth migration starts way before you move a single file. Each prep step builds the foundation for the next.
The Manual Migration: A Hands-On Approach
The manual method is the classic way to do things. It means you're directly grabbing your site's two core components—the files and the database—and putting them back together on the new server. This approach gives you total control and a much deeper understanding of how all the pieces of your site fit together.
Think of it like moving houses yourself. You pack every box, drive the truck, and unpack it all. It’s more work, but you know exactly where everything is and that it was handled with care.
The process usually looks something like this:
- File Transfer: You'll fire up an SFTP client like FileZilla or Cyberduck, connect to your old host, and download your entire
public_htmldirectory. Then you do the reverse: connect to the new host and upload everything. - Database Export: Log into your old host’s phpMyAdmin, find your WordPress database, and export it as an
.sqlfile. - Database Import: On the new host, create a fresh, empty database. Open its phpMyAdmin and import the
.sqlfile you just saved. - Configuration Update: This is the step that trips a lot of people up. You have to edit the
wp-config.phpfile on the new server, updating the database name, username, and password to match the new credentials you just created.
While this method is solid, it demands your full attention. One little typo in wp-config.php can take your entire site down with that dreaded "Error establishing a database connection" message.
The Plugin-Powered Migration: Automated and Efficient
If the manual route sounds like a headache waiting to happen, you’re in luck. The WordPress world is packed with amazing plugins built to automate this entire process. Tools like All-in-One WP Migration and Duplicator are industry standards for a good reason—they make moving a site almost foolproof.
These plugins work by bundling your whole site—files, database, themes, plugins, everything—into a single, neat package. You just install the plugin on the old site, tell it to create the package, and download the file.
Then, you set up a blank WordPress install on your new host, install the same migration plugin, and upload your package file. The plugin does all the heavy lifting. It unpacks the files, imports the database, and even runs a search-and-replace to update all your internal URLs. It’s a huge time-saver.
Key Takeaway: Plugin-based migrations drastically cut down on the risk of human error. They handle the tricky parts like database configuration and URL updates, which are the most common failure points in a manual move.
This automation is a lifesaver, especially with how complex WordPress sites can get. With over 60,000 free plugins out there, every site is a unique puzzle. Modern WordPress versions, like the one used by 76.7% of sites, also have architectural quirks that migration plugins are built to handle seamlessly.
Migration Method Showdown: Manual vs. Plugin
This table breaks down the key differences to help you decide which path is right for you. It highlights the trade-offs between control, effort, and reliability.
| Factor | Manual Migration (SFTP/phpMyAdmin) | Plugin-Based Migration |
|---|---|---|
| Effort | High. Requires technical steps and careful execution. | Low. Mostly automated, with a simple wizard-like process. |
| Control | Full. You handle every file and database table directly. | Limited. The plugin handles the technical details for you. |
| Reliability | Depends on user skill. High risk of human error. | Very high. Automates complex steps to prevent common mistakes. |
| Speed | Slow. Downloading/uploading can take hours for large sites. | Fast. Creates a compressed archive for quicker transfers. |
| Best For | Developers, very large sites, or troubleshooting broken sites. | Most users, from beginners to agencies, for standard sites. |
Ultimately, choosing between these two comes down to a classic speed-vs-control debate.
So, Which Path Should You Take?
For most people—especially if you’re running a standard blog, portfolio, or small business site—a plugin is the smarter, safer, and faster bet. It just works.
But the manual method still has its place.
- For Massive Sites: Some plugins have upload size limits on their free versions. If your site has gigabytes of media, SFTP might be more reliable.
- For Learning and Control: If you’re a developer (or want to become one), doing a manual migration is a fantastic learning experience. It forces you to get your hands dirty.
- For Broken Sites: If a site is already having issues with plugin conflicts, a manual migration of clean files and a repaired database might be your only option.
If neither of these DIY options feels right, especially if you’re juggling client projects or just want it done perfectly, there’s a third way. Professional WordPress migration services offer an expert-handled approach with guaranteed results, taking the whole problem off your plate.
In the end, both methods get you to the finish line. A manual transfer gives you granular control but comes with more complexity. A plugin gives you speed and simplicity. Just assess your own comfort level and your site’s needs to make the right call.
Simplifying Migration with a Modern Control Panel
What if the most tedious and error-prone parts of a server setup could just… disappear? Both the manual and plugin-based methods we’ve covered are solid, but they both rely on a huge assumption: that you already have a perfectly configured, secure, and optimized server waiting for your site. Honestly, that’s the hardest part for most people.
This is where a modern control panel completely changes the game. Instead of you needing to moonlight as a server administrator, tools like WPJack take care of the entire server provisioning process for you. It’s a much smarter workflow that saves a ton of time and cuts out a massive potential for mistakes.
From Hours of Setup to a Few Clicks
Setting up a new WordPress server the old-school way is a command-line-heavy nightmare. You’d have to install and configure a web server like Nginx, get the right PHP version and all its extensions working, install and secure a database like MariaDB, and maybe even add performance layers like Redis caching. One wrong move, and your migration is dead in the water before you’ve even moved a single file.
A modern control panel flips this entire model on its head.
You just connect your cloud provider account—like DigitalOcean, Vultr, or Hetzner—to the control panel. Then, with a few clicks, it spins up a brand new server with a high-performance stack already installed and fine-tuned for WordPress.
- Optimized Stack: No more guesswork. You get Nginx, the latest stable PHP, MariaDB, and Redis object caching right out of the box.
- Automated Security: The server is automatically hardened with a firewall, SFTP is set up, and other security best practices are applied from the start.
- Instant WordPress Install: You can even have a fresh WordPress installation waiting for your migrated content.
This whole process turns what could be hours of technical work into something you can knock out in less than 15 minutes. For a closer look, check out our guide on how to provision a web server and install WordPress with minimal effort.
Think of it like this: using a control panel to provision your server is like having a seasoned sysadmin build you a custom-tuned WordPress environment on demand. You get all the power of an optimized server without the headache of building it yourself.
How This Simplifies Your Migration Workflow
With the server completely ready to go, your mission to transfer a WordPress site to a new host becomes dramatically simpler. The migration process stops being about server configuration and boils down to just two core steps: moving your data into its pristine, ready-made home.
You just need to:
- Upload Your Files: Use the SFTP credentials the panel gives you to upload your
wp-contentfolder and other core files. - Import Your Database: Create a new, empty database through the control panel’s interface, then use a tool like phpMyAdmin to import your
.sqlbackup.
That’s it. The whole server-side setup, often the most intimidating part of a manual migration, is already done for you.
A Game-Changer for Agencies and Freelancers
This streamlined approach is a lifesaver for anyone managing multiple client websites. Imagine you have to migrate three client sites this week. Doing that manually means setting up three separate servers—a massive time sink filled with repetitive, error-prone tasks.
Using a control panel, you could provision all three optimized servers in under an hour. This efficiency boost frees you up to focus on what actually matters: making sure the client’s site is moved flawlessly and runs beautifully on its new infrastructure. It turns a technical nightmare into a repeatable, reliable, and highly profitable service.
This workflow doesn’t just save time; it standardizes your environment. Every server you spin up has the same best-practice configuration, making ongoing management, troubleshooting, and security updates far easier across your entire portfolio. You get to ditch the chaos of managing dozens of unique, snowflake server setups.
Your Post-Migration Go-Live Checklist
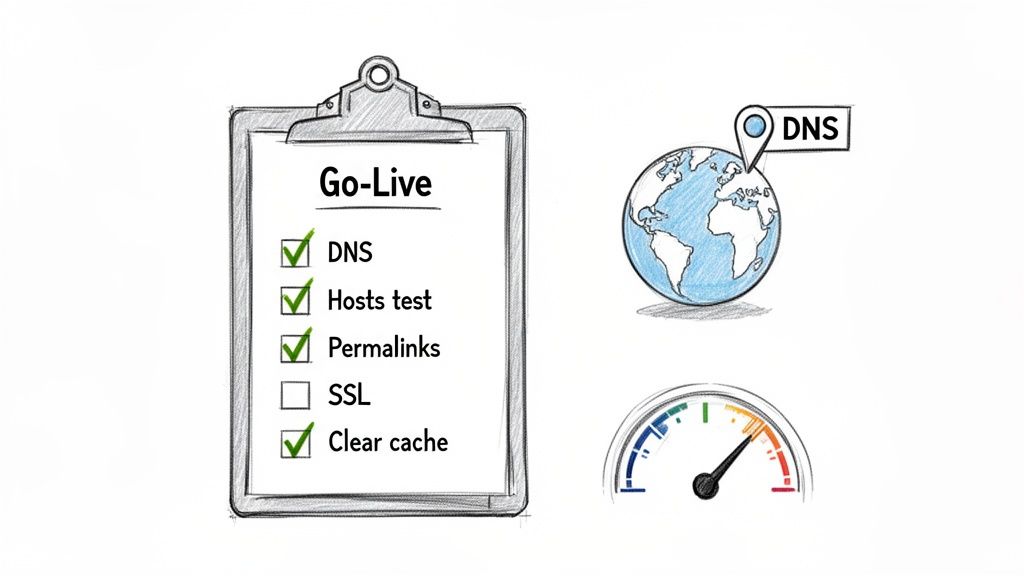
You’ve wrestled the files and database into their new home. It’s tempting to call it a day, but this is where the real work begins. The final checks you perform now will determine if your effort to transfer your WordPress site to a new host was a true success.
Before flipping the switch, you need a way to spy on the new site privately. The trick is to edit your local hosts file. This tells your computer, and only your computer, to load your domain from the new server’s IP address. It’s like having a secret backstage pass.
This private preview is your last chance to hunt down any weird bugs. Click through every single page, check your plugins, and make sure all the images are loading. Think of it as a final dress rehearsal.
Final Technical Tune-Ups
Once you’re happy with how the site looks on your machine, there are a few classic WordPress quirks to iron out. These quick adjustments tell WordPress it’s in a new environment and prevents some all-too-common headaches.
- Regenerate Your Permalinks: Pop over to
Settings > Permalinksin the WordPress admin and just hit “Save Changes.” That’s it. This one click flushes the rewrite rules and stops those dreaded 404 errors from showing up on your posts. - Secure Your Site with SSL: An SSL certificate isn’t optional anymore. If you’re using a control panel like WPJack, you can issue a free Let’s Encrypt certificate with a click. It handles the whole install and even the renewals for you.
- Test All Critical Functions: Don’t just browse; actually use the site. Submit your contact forms. Sign up for your own newsletter. If it’s an e-commerce site, run a test transaction from start to finish.
The whole point here is to walk in your user’s shoes. A broken contact form or a glitchy checkout can cost you real money and tank your reputation. Be your own toughest critic.
Updating DNS and Riding Out Propagation
Everything looks good? Great. It’s go-time. This means logging into your domain registrar (like GoDaddy or Namecheap, not your hosting provider) and updating your domain’s DNS records. You’re looking for the main “A” record, which you’ll point to the new server’s IP address.
Now, this change isn’t like flipping a light switch. It kicks off something called DNS propagation, where servers all over the world start updating their address books with your site’s new location. This can take a few minutes or up to 48 hours, but in my experience, it’s usually done in an hour or two.
During this window, some people will hit the old site and some will hit the new one. This is totally normal and exactly why you haven’t touched the old site since you took that first backup.
The Final Cache Purge
Last step. Caching is your best friend for site speed, but it can be your worst enemy after a migration by stubbornly serving old content. You need to clear it out from every possible layer.
- Browser Cache: Start with your own browser. A quick clear ensures you’re seeing the live site, not a saved copy on your machine.
- WordPress Caching Plugins: Using something like WP Rocket or W3 Total Cache? Find that big “Purge All Caches” button in your dashboard and smash it.
- Server-Level Cache: If your new host uses server-side caching like Redis (or if you’re using a tool like WPJack that manages it), you’ll need to flush it from the control panel.
- CDN Cache: On Cloudflare or another CDN? Log into its dashboard and purge the cache there, too.
This consistent interest in the platform is undeniable. Google Trends data reveals that WordPress search volume shot past 16 million average monthly searches in 2024 and early 2025, highlighting a constant stream of people making hosting decisions and migrations. You can dive deeper into these WordPress statistics to grasp the platform’s massive influence.
As you get ready to launch, make sure your analytics are ready to go by running through a comprehensive web analytics audit checklist. With these final pieces in place, you can finally pop that champagne. Your migration is a success.
Answering Your Top WordPress Migration Questions
No matter how carefully you plan, a few questions always seem to pop up during a technical project like a site migration. I’ve been through this process countless times, and a few common worries come up again and again. Let’s tackle them head-on so you can avoid any late-night stress sessions.
One of the first things people forget is email. It’s easy to assume your email accounts move with your website, but they often don’t. Your email hosting might be bundled with your old web host. Before you do anything else, find out where your email is hosted. If it’s with the old provider, you’ll need a separate plan to move it or switch to a dedicated service like Google Workspace or Microsoft 365.
Will My SEO Rankings Drop After a Migration?
This is probably the biggest fear, and it’s a valid one. The good news is that a well-executed migration should have minimal to no negative impact on your SEO. Seriously.
The whole game is to avoid downtime and make sure every single URL works exactly as it did before. This isn’t the time to change your site structure or permalinks. Google knows that sites change hosts. As long as your domain name, content, and URLs stay identical, search engines just update their index with the new server’s IP address. Using the hosts file trick for testing is your secret weapon here—it prevents you from ever launching a broken site that could tank your rankings.
A successful migration is invisible. To your users and to Google, nothing should seem different except for maybe a speed boost. If you pull that off, your SEO is safe and sound.
How Long Will My Site Be Down?
With a modern approach, you can get this down to zero actual downtime. We’re not “taking the site down” to move it. Instead, you’re building a perfect clone on the new server while your original site keeps running for all your visitors.
The only fuzzy part is what’s called DNS propagation. After you point your domain to the new server, there’s a window of a few minutes to a few hours where some traffic hits the old server and some hits the new one. But since both sites are identical clones, the user experience is completely seamless. No one ever sees an error page.
What If My Site Is Really Big?
Okay, migrating a massive WordPress site definitely has its own challenges. If you’re dealing with gigabytes of uploads or a huge database, those all-in-one migration plugins will often time out and fail. Trying to upload a giant .zip file through a browser is just asking for trouble.
For big sites, I almost always recommend a manual transfer using SFTP. It’s a much more robust tool designed for moving large files without failing.
Here’s the approach:
- For Files: Grab a dedicated SFTP client like FileZilla. It’s great because it can handle connection drops and automatically resume transfers right where they left off.
- For Databases: If your
.sqlexport is too big to import via phpMyAdmin (a common issue), you can use a script like BigDump. It cleverly imports the database in smaller chunks to get around server timeouts.
Getting ahead of these common questions will make your entire migration project feel a lot less daunting and run much more smoothly.
Ready to skip the server setup headaches and simplify your next migration? With WPJack, you can provision a fully optimized WordPress server on your favorite cloud provider in minutes. Get started for free and see how easy managing WordPress can be.
Free Tier includes 1 server and 2 sites.